
iStorage Server Online Help

| KernSafe iSCSI SAN Quick Start | KernSafe iSCSI SAN User Manual |
|
KernSafe iSCSI SAN is an IP Storage solution, you can use it to export your storage device to local attached storage device in client machines. When you want to use CHAP authorization, please first create a CHAP user(secret is 123456781234) and group, otherwise, bypass the user and group creation. Here we created a user named test that belongs to a new created group named Administrators. Simply, for using KernSafe iSCSI SAN, press the Create button in the main interface of KernSafe iSCSI SAN Management console, will start the Select Device Type wizard, see figure 1, you can select the following device types to share your storage device:
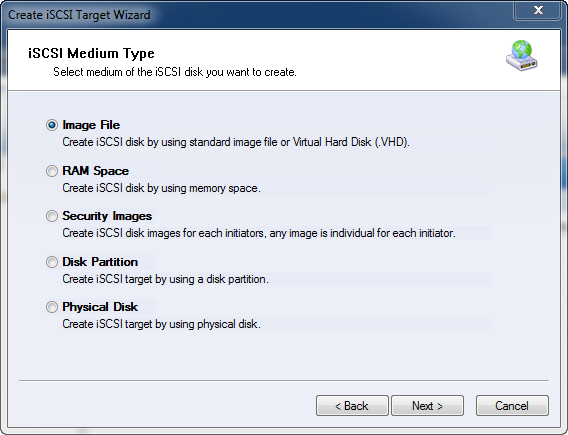
1. Hard Disk In this type, you can create iSCSI target by using physical disk, partition, standard image file or Virtual Hard Disk (VHD). There are five types as show in figure 2:
Image File; RAM Space; Security Images; Disk Partition; 2. Optical Device In this type, you can create iSCSI target by using physical optical drive, Virtual Optical Drive or even create a virtual CD/DVD burner. There are three types as show in figure 3:
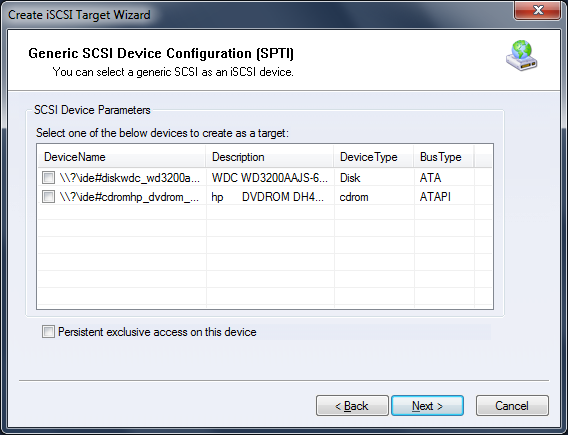
Virtual Optical Drive Virtual Recordable Optical Drive Physical Drive; 3. Generic SCSI In this type, you may map generic SCSI devices to your initiator, such as USB Storage, Tape and Optical Scanner(figure 4).
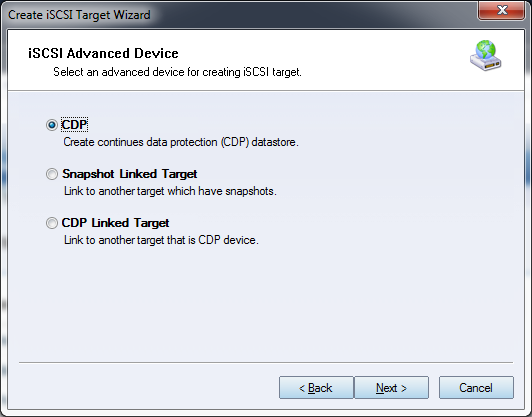
3. Advanced device This type of device allow you to create advanced devices such as
CDP or snapshots.
In this type, you can create a continuous data protection device. Snapshot Linked Target In this type, you can create a snapshot that is linked to another target that is already created. CDP Linked Target In this type, you can create a CDP device that is linked with another target that is already created. At the client, take the Microsoft initiator as an
example, just do the following steps to connect iSCSI target
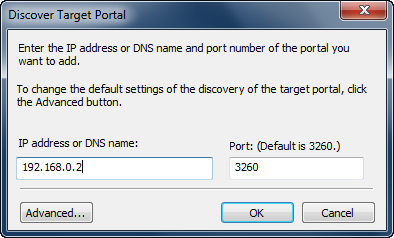
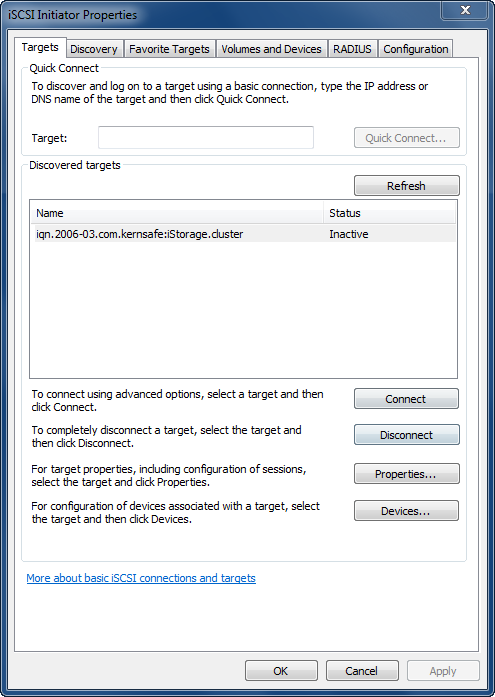
provided by KernSafe iSCSI SAN. In the Add Target Portal dialog box, provide the name or IP address of your computer that is running KernSafe iSCSI SAN. The default communication port for iSCSI traffic is 3260. Unless you have changed server's port, leave this as is. Even though you're connected to the array itself, you still need to tell the initiator exactly which target or volume you want to mount on your local machine. To see the list of available targets on the array you selected, choose the Targets tab, shown in Figure 6.
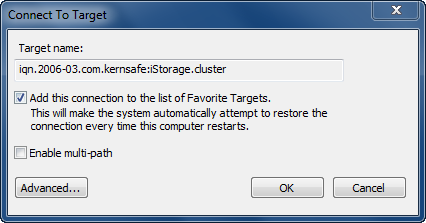
To connect to an available target, choose the target and click the Log On button. A window pops up (Figure 7) with the target name and two options from which you can choose.
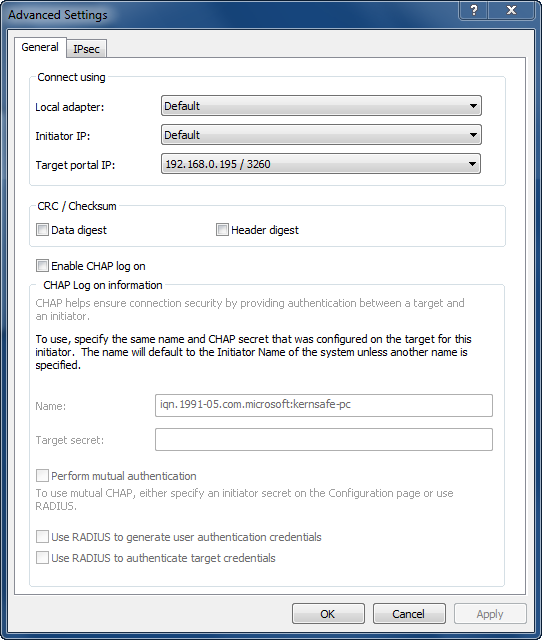
Click on the Advanced button and make necessary configuration changes. The Advanced Settings dialog box is shown in Figure 8. And then input your CHAP user name(test) and secret(123456781234) if the target using the CHAP authorization.
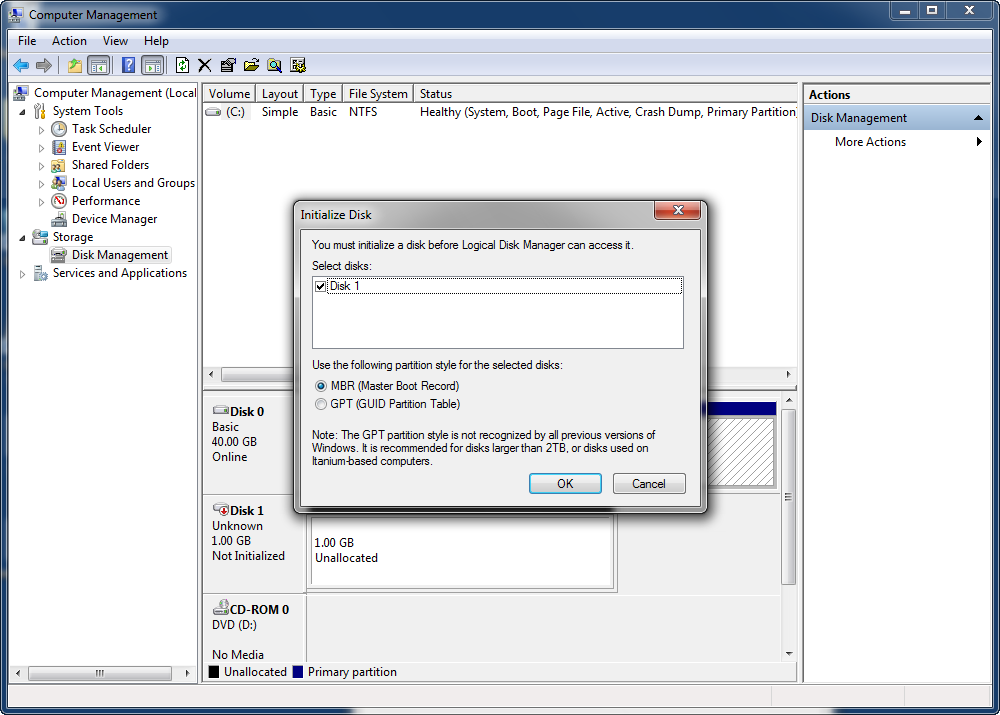
When you mount a brand new iSCSI-based volume on your server, Windows treats it the same as if you had added a new hard drive to your computer. Take a look at this: Open Computer Management (Click one the Start button, right-click My Computer and then select Manage). Choose the Disk Management option. If the volume you are using is still blank -- that is, newly created on your iSCSI target and does not contain data -- Windows will pop up the Disk Initialization wizard, as shown in Figure 9. Just as a physical hard disk, you need to initialize the new drive, create a partition, and format the new volume. Enjoy! |
|


SUPPORT
- Forum
- Support Ticket
- [email protected]

- Voice Mail:
- +1 (518) 289-4888